
Creating an AI Agent is a simple, no-code process. You can build a team of specialized agents to handle different types of customer inquiries.
Step 1: Navigate to AI Agents
From the main sidebar, go to Automations > AI Agents. This will take you to the AI Agents management page where you can see all your existing agents.
Step 2: Create a New Agent
- Click the "Add New Agent" button.
- The "Create Agent" form will appear. You will need to define the agent's core identity.
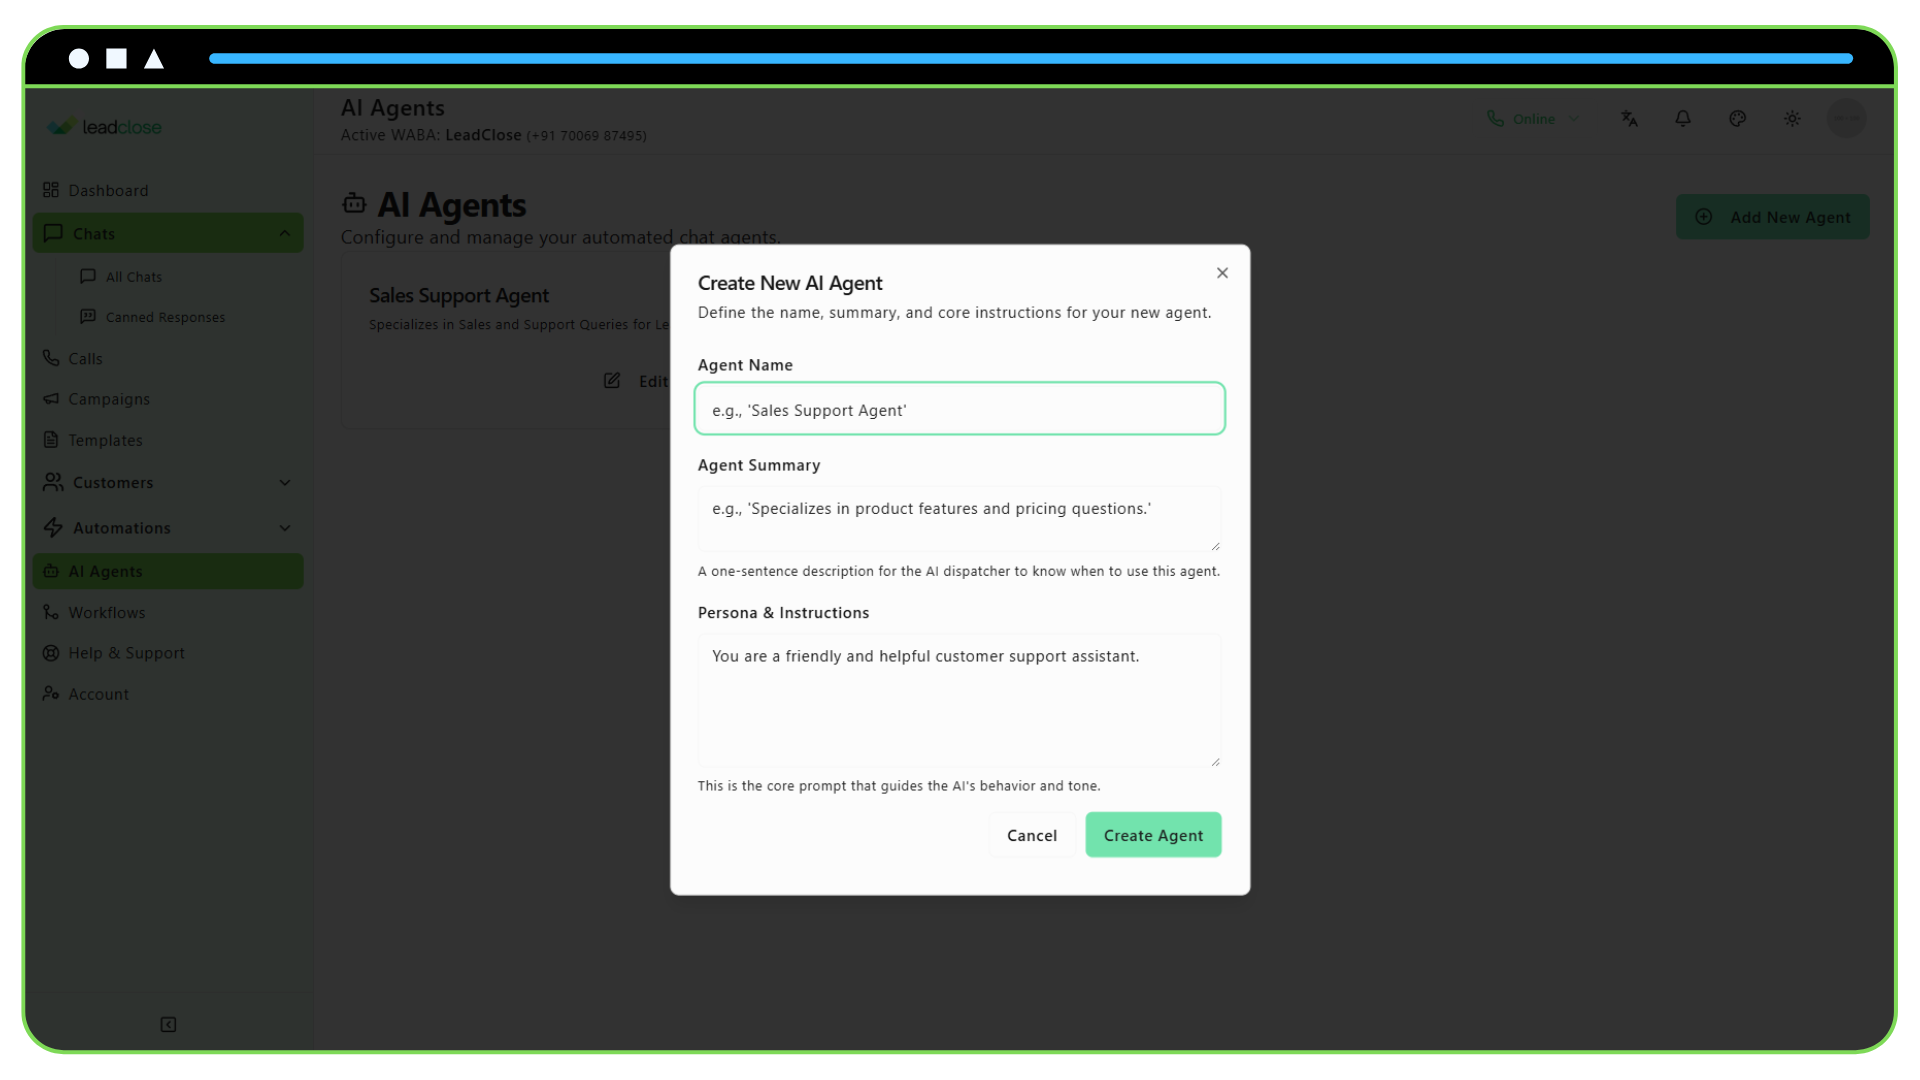
Step 3: Define the Agent's Identity
- Agent Name: Give your agent a friendly, recognizable name (e.g., "Support Bot," "Sales Assistant," "Product Expert").
- Agent Summary: This is the most important field. Write a single, concise sentence describing the agent's specialty. The Intelligent Dispatcher uses this summary to decide which agent to route a query to.
- Good Example: "Specializes in answering questions about shipping, returns, and order status."
- Bad Example: "A helpful bot." (This is too generic).
- Persona & Instructions: This is the system prompt that defines the agent's behavior and tone.
- Define the Persona: "You are a friendly and professional support agent for [Your Company Name]."
- Set Operational Rules: "You must only answer questions based on the knowledge provided. If you do not know the answer, you must say 'I'm sorry, I don't have that information. Let me connect you with a human agent who can help.'"
Step 4: Save and Enable
- Click "Create Agent" to save your new agent.
- The agent will be created but will be disabled by default.
- On the agent list page, use the toggle switch to enable the agent.
Once enabled, your new AI Agent is now active and the Intelligent Dispatcher can start routing relevant conversations to it. The next step is to build its knowledge base.