Campaigns allow you to send a targeted message template to an entire segment of your customers at once.
Step 1: Basic Information
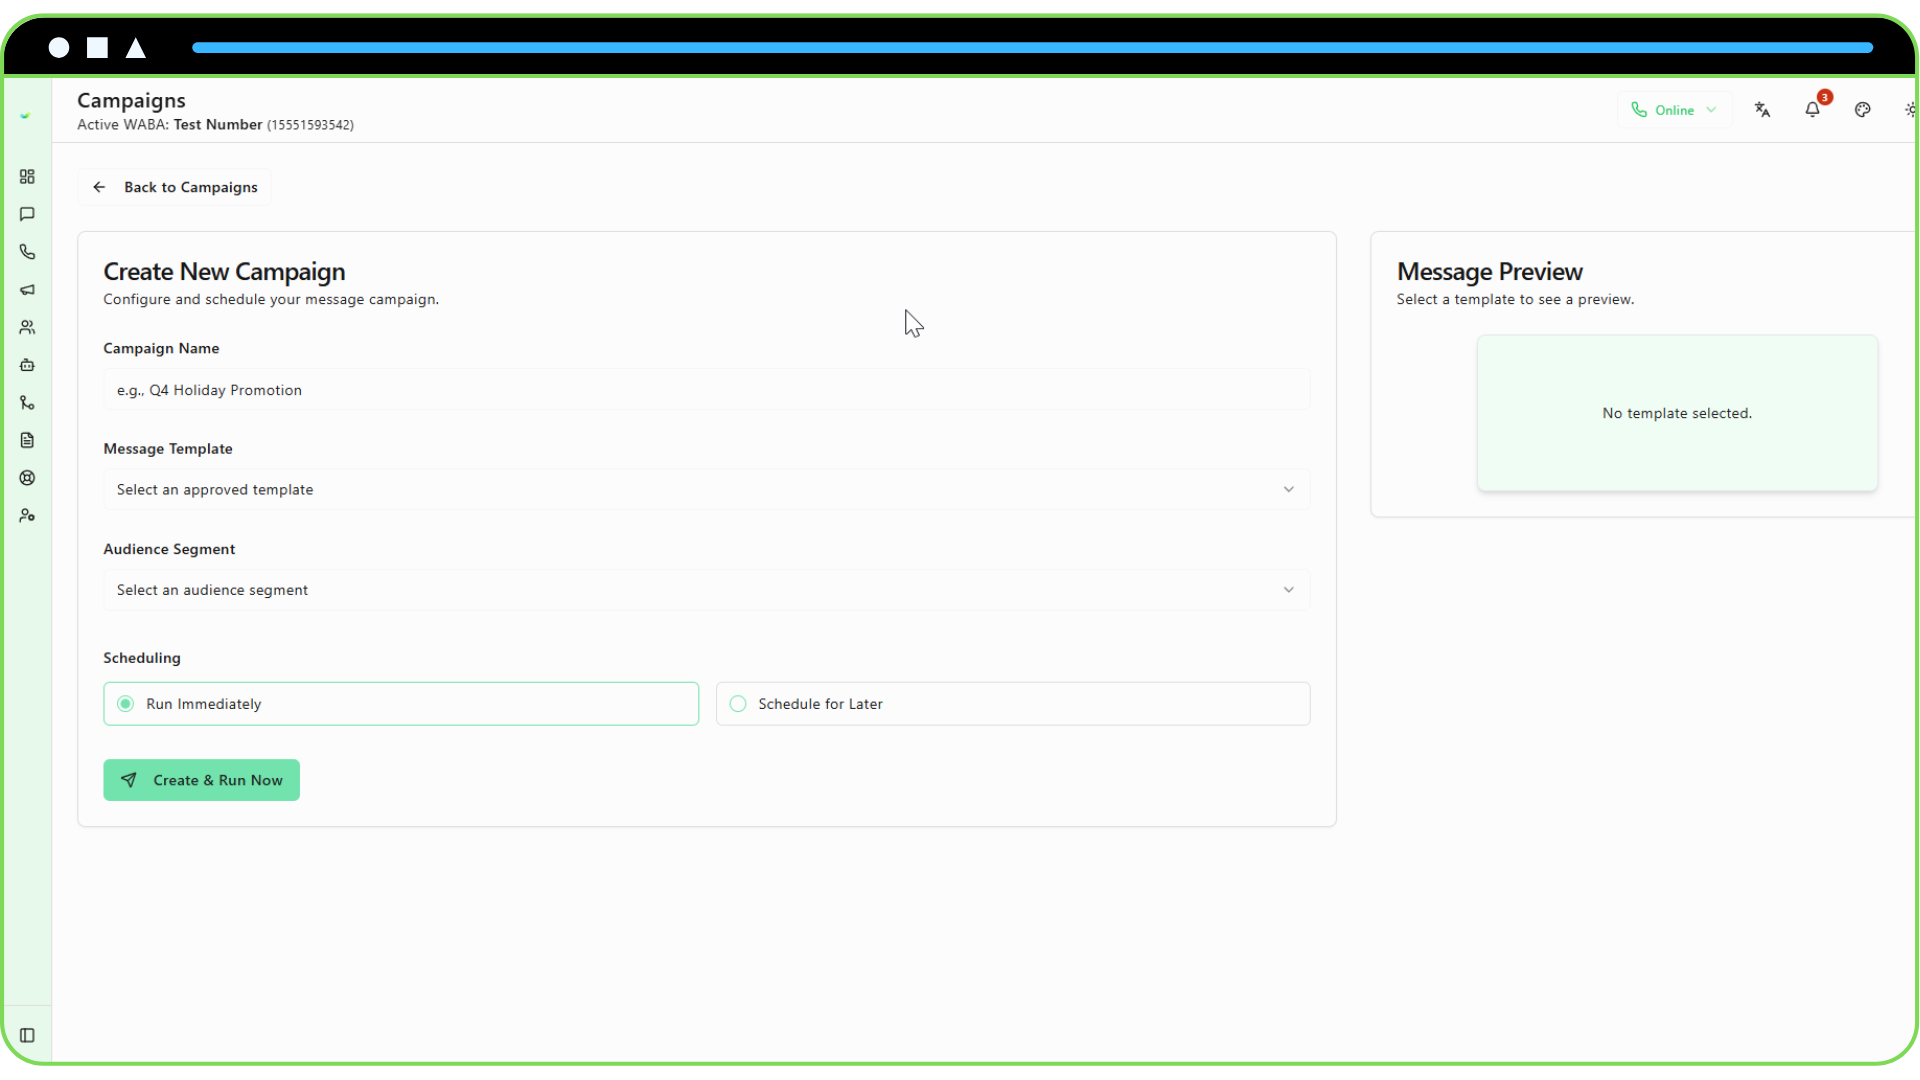
- Navigate to Campaigns: Click
Campaignsin the sidebar and then click "Create Campaign". - Campaign Name: Give your campaign a descriptive name for your own reference (e.g., "Q4 Holiday Promotion").
- Message Template: Select an approved message template from the dropdown list. You can only use templates that have been approved by Meta.
- Audience Segment: Choose the customer segment you want to send this message to. This can be a static or dynamic list you've previously created.
Step 2: Map Content
This step connects the dynamic parts of your template to your customer data.
Map Header Media (if applicable): If your chosen template has a media header (image, video, or document), you will be prompted to either use the default media from the template or upload a new file specifically for this campaign.
Map Placeholders: If your template has variables like
{{1}}, you must map each one to a field from your customer profiles (e.g., map{{1}}to theNamefield). The message preview on the right will update to show you how the personalized message will look for a sample customer from your selected segment.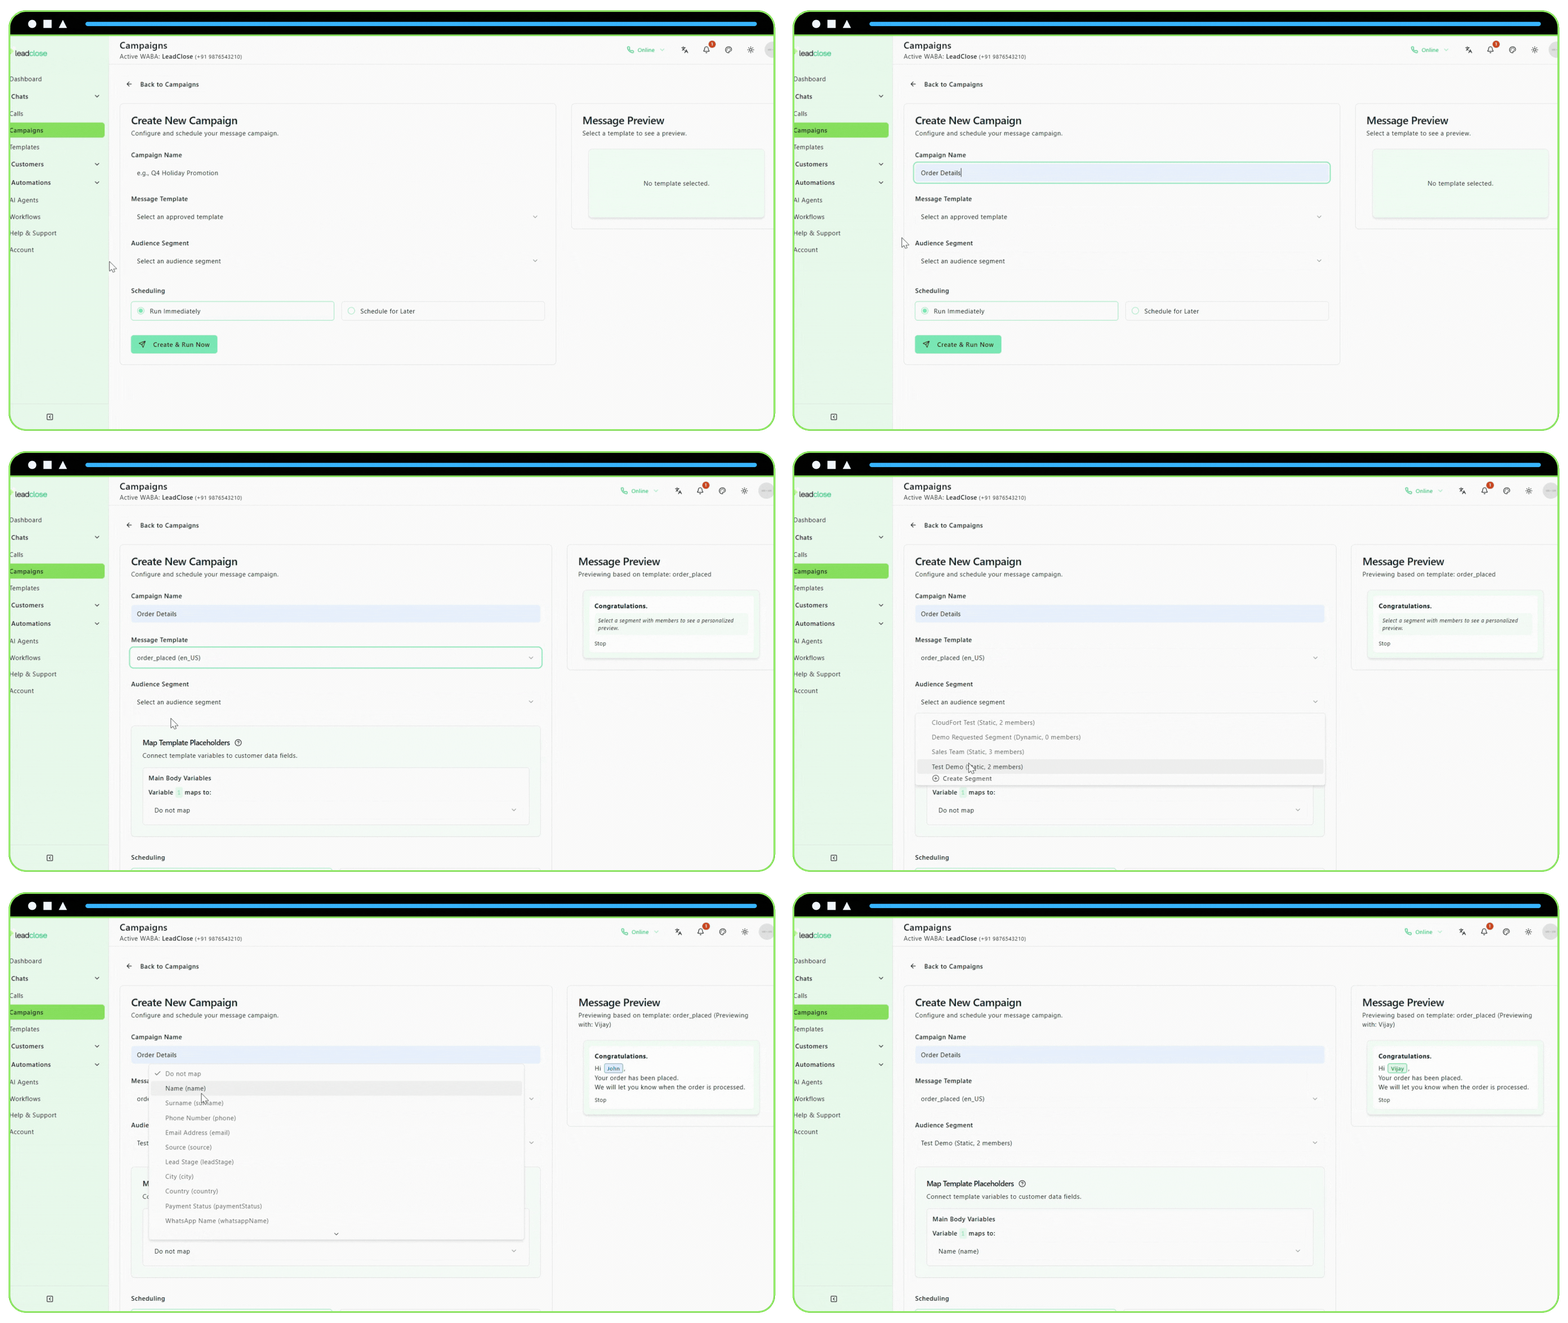
Step 3: Scheduling
Choose when you want the campaign to be sent.
- Run Immediately: The campaign will be queued for sending as soon as you create it.
- Schedule for Later: Choose a specific future date and time. The campaign will automatically start at that time.
Step 4: Create & Run
Once everything is configured, click "Schedule Campaign" or "Create & Run Now".
- Scheduled campaigns will appear in the "Scheduled" tab on the Campaigns page, where you can still edit or cancel them before they run.
- Immediately run campaigns will move to the "Active" tab while they are processing and then to the "History" tab once complete.